ArgoCD 설치 AWS & GCP
Overview
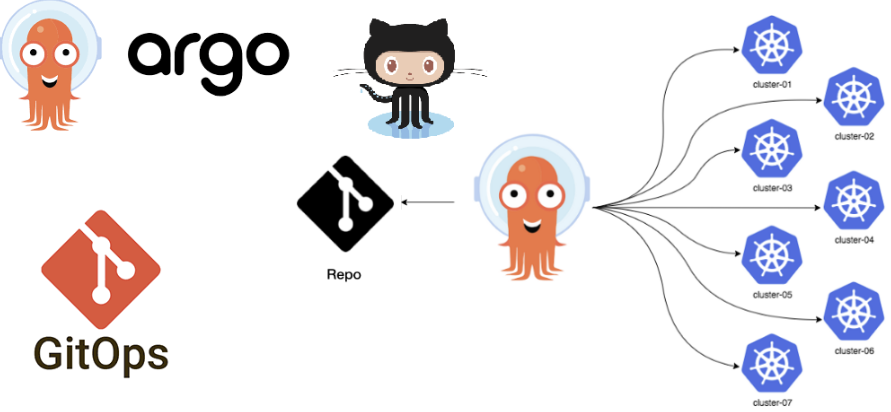
이번 글에서는 GitLab을 ArgoCD와 연동하여 GitOps 방식으로 애플리케이션을 배포하는 과정을 살펴본다.
ArgoCD는 Git 저장소의 선언적 Kubernetes 설정을 감지하고, 클러스터 상태를 자동으로 동기화해주는 오픈소스 도구이다. GitLab은 코드 저장소뿐만 아니라 CI/CD를 위한 강력한 기능을 갖춘 DevOps 플랫폼이다.
하지만 외부 Git 서비스(Bitbucket, GitHub 등)와 달리 자체 구축한 GitLab 서버를 사용할 경우, SSH 인증 키와 known_hosts 설정이 필요하다.
본 글에서는 사설 GitLab 저장소를 ArgoCD에 안전하게 연동하고, GitOps 기반 Application을 배포하는 데 필요한 설정 및 흐름을 자세히 정리하였다.
ArgoCD
2023.05.16 - [IaC/CI CD Tool] - ArgoCD란?
2023.08.09 - [IaC/CI CD Tool] - ArgoCD 설치 AWS & GCP
2023.10.02 - [IaC/CI CD Tool] - ArgoCD ApplicationSet이란? (작성 방법)
2023.10.08 - [Container Orchestration/Kubernetes] - 2. Kustomize + ArgoCD ApplicationSet
2024.02.02 - [IaC/CI CD Tool] - Argo Workflow란?
2024.04.09 - [IaC/CI CD Tool] - ArgoCD SSO 구성 가이드(GCP Oauth)
2025.02.19 - [IaC/CI CD Tool] - ArgoCD SSO 구성 가이드(Gitlab)
ArgoCD Install
argocd 설치 방법은 Cloud 환경 또는 Onpremise 환경이라고 크게 다르지 않다.
kubectl create ns argocd

# Normal mode
kubectl apply -n argocd -f https://raw.githubusercontent.com/argoproj/argo-cd/stable/manifests/install.yaml

# HA mode
kubectl apply -n argocd -f https://raw.githubusercontent.com/argoproj/argo-cd/stable/manifests/ha/install.yaml
argocd cli 설치 방법은 아래와 같다.
# 리눅스 기준
curl -sL -o argocd https://github.com/argoproj/argo-cd/releases/download/v2.7.1/argocd-linux-amd64

chmod +x argocd
sudo mv argocd /usr/local/bin/
AWS ArgoCD Setting
해당 Github 링크에 소스코드가 잘 정리되어 있다.
argocd ingress 셋팅은 아래와 같이 해주면 된다.
apiVersion: networking.k8s.io/v1
kind: Ingress
metadata:
  annotations:
    alb.ingress.kubernetes.io/backend-protocol: HTTPS
    alb.ingress.kubernetes.io/certificate-arn: arn:aws:acm:ap-northeast-2:5xxxxxxxxxxxxxx:certificate/bxxxxxx-6xxx-4xxx-bxxx-4xxxxxxxxxx
    alb.ingress.kubernetes.io/healthcheck-path: /
    alb.ingress.kubernetes.io/healthcheck-protocol: HTTP
    alb.ingress.kubernetes.io/listen-ports: '[{"HTTPS":443}, {"HTTP":80}]'
    alb.ingress.kubernetes.io/scheme: internet-facing
    alb.ingress.kubernetes.io/target-type: ip
    kubernetes.io/ingress.class: alb
  name: argocd
  namespace: argocd
spec:
  rules:
  - host: argocd.somaz.link
    http:
      paths:
      - path: /*
        pathType: ImplementationSpecific
        backend:
          service:
            name: argocd-server
            port:
              number: 80
github 연동은 아래와 같이 해준다.
ssh key를 생성후에, pub 키는 github ssh key로 등록을 해준뒤 아래에는 pri 키를 넣어준다.
apiVersion: v1
kind: Secret
metadata:
  name: somaz-repo-secret
  namespace: argocd
  labels:
    argocd.argoproj.io/secret-type: repository
stringData:
  type: git
  url: git@github.com:somaz94/helm-chart-template.git
  sshPrivateKey: |
    -----BEGIN OPENSSH PRIVATE KEY-----
    b3BlbnNzaC1rZXktdjEAAAAABG5vbmUAAAAEbm9uZQAAAAAAAAABAAABlwAAAAdzc2gtcn # Change to the private key registered in github
    NhAAAAAwEAAQAAAYEA2dF3+NkGwDOmc3xWtZPZixq8SeY3Any1kkGmw57R8tRLpkpTtXrk
    ...
    -----END OPENSSH PRIVATE KEY-----
`aws-auth` 를 사용해서 알맞은 IAM 권한을 설정해준뒤에 아래와 같이 `arn` 을 적어주면 된다.
k get cm -n kube-system aws-auth -o yaml | k neat
apiVersion: v1
data:
  mapRoles: |
    - groups:
      - system:bootstrappers
      - system:nodes
      - system:node-proxier
      rolearn: arn:aws:iam::53xxxxxxxxx:role/AmazonEKSFargatePodExecutionRole
      username: system:node:{{SessionName}}
  mapUsers: |
    - groups:
      - system:masters
      userarn: arn:aws:iam::4921xxxxxxxx:user/admin
      username: admin
    - groups:
      - system:masters
      userarn: arn:aws:iam::4921xxxxxxxx:user/somaz
      username: somaz
kind: ConfigMap
metadata:
  name: aws-auth
  namespace: kube-system
마지막으로 클러스터 연동은 아래와 같이 해준다.
argocd login argocd.somaz.link

argocd cluster add <cluster arn> --name somaz-eks --system-namespace <namespace> (default=kube-system)
argocd cluster add arn:aws:eks:ap-northeast-2:5340xxxxxxxxx:cluster/somaz-eks --name somaz-eks --system-namespace kube-system
GCP ArgoCD Install
해당 Github 링크에 소스코드가 잘 정리되어 있다.
먼저 LoadBalancer Static IP와 GCP DNS 호스팅영역을 생성해준다.
## Load Balancer Static IP ##
resource "google_compute_global_address" "static_loadbalancer" {
  name = var.loadbalacner_ip_name
}

## Cloud DNS ##
resource "google_dns_managed_zone" "mgmt_zone" {
  name     = "mgmt-somaz-link"
  dns_name = "mgmt.somaz.link." # Notice the trailing dot, it's necessary
}

## Load Balancer Static IP & Cloud DNS Record  ##
resource "google_compute_global_address" "argocd_lb_ip" {
  name = var.argocd_lb_ip_name # 변수는 somaz-gke-argocd-lb-ip로 설정해줬다.
}

resource "google_dns_record_set" "argocd_record" {
  depends_on = [google_dns_managed_zone.mgmt_zone]
  name         = "argocd.mgmt.somaz.link." # Notice the trailing dot, it's necessary
  type         = "A"
  ttl          = 300
  managed_zone = google_dns_managed_zone.mgmt_zone.name
  rrdatas      = [google_compute_global_address.argocd_lb_ip.address] # Replace with your IP address
}
내부 TLS를 비활성화 해줘야 한다.
# k edit 명령어로 수정해준다.
k get cm -n argocd argocd-cmd-params-cm -o yaml | k neat
apiVersion: v1
data:
  redis.server: argocd-redis-ha-haproxy:6379
  server.insecure: "true" # 해당 부분에 추가해준다.
kind: ConfigMap
metadata:
  labels:
    app.kubernetes.io/name: argocd-cmd-params-cm
    app.kubernetes.io/part-of: argocd
  name: argocd-cmd-params-cm
  namespace: argocd

# pod 재시작
k delete po -n argocd argocd-server-56769fd48c-c6x28 argocd-server-56769fd48c-zrtw2
pod "argocd-server-56769fd48c-c6x28" deleted
pod "argocd-server-56769fd48c-zrtw2" deleted
그리고 service도 수정해준다. `cloud.google.com/backend-config` 추가해줘야 한다.
`annotations` 밑에 `backend-config` 를 추가해주면 된다.
k get svc -n argocd argocd-server -o yaml | k neat
apiVersion: v1
kind: Service
metadata:
  annotations:
    cloud.google.com/backend-config: '{"ports": {"http":"argocd-backend-config"}}' # 해당부분에 backend config를 추가해준다.
    cloud.google.com/neg: '{"ingress":true}'
    cloud.google.com/neg-status: '{"network_endpoint_groups":{"80":"k8s1-b9abc919-argocd-argocd-server-80-14104304"},"zones":["asia-northeast3-a","asia-northeast3-b"]}'
  labels:
    app.kubernetes.io/component: server
    app.kubernetes.io/name: argocd-server
    app.kubernetes.io/part-of: argocd
  name: argocd-server
  namespace: argocd
spec:
  clusterIP: 10.32.131.190
  clusterIPs:
  - 10.32.131.190
  internalTrafficPolicy: Cluster
  ipFamilies:
  - IPv4
  ipFamilyPolicy: SingleStack
  ports:
  - name: http
    port: 80
    targetPort: 8080
  - name: https
    port: 443
    targetPort: 8080
  selector:
    app.kubernetes.io/name: argocd-server
그리고 `argocd-certificate.yaml` 과 `argocd-ingress.yaml` 설정해준뒤 배포해준다.
# argocd-certificate
apiVersion: networking.gke.io/v1
kind: ManagedCertificate
metadata:
  name: argocd-certificate
spec:
  domains:
    - argocd.somaz.link # Modified your Domain
apiVersion: cloud.google.com/v1
kind: BackendConfig
metadata:
name: argocd-backend-config
namespace: argocd
spec:
healthCheck:
checkIntervalSec: 30
timeoutSec: 5
healthyThreshold: 1
unhealthyThreshold: 2
type: HTTP
requestPath: /healthz
port: 8080
---
apiVersion: networking.gke.io/v1beta1
kind: FrontendConfig
metadata:
name: argocd-frontend-config
namespace: argocd
spec:
redirectToHttps:
enabled: true
---
apiVersion: networking.k8s.io/v1
kind: Ingress
metadata:
name: argocd-server-ingress
namespace: argocd
annotations:
kubernetes.io/ingress.global-static-ip-name: "somaz-gke-argocd-lb-ip" # Modified global-static-ip-name
networking.gke.io/managed-certificates: "argocd-certificate"
kubernetes.io/ingress.class: "gce"
networking.gke.io/v1beta1.FrontendConfig: argocd-frontend-config
spec:
rules:
- host: argocd.somaz.link # Modified Domain
http:
paths:
- pathType: Prefix
path: "/"
backend:
service:
name: argocd-server
port:
number: 80
그리고 아래와 같이 배포해준다.
kubectl apply -f argocd-ingress.yaml -n argocd
kubectl apply -f argocd-certificate.yaml -n argocd
repo-secret을 작성해주는건 AWS의 방법과 동일하다.
클러스터 연동은 아래와 같이 해준다.
GKE는 kube-system 네임스페이스에 어떠한 리소스도 생성할 수 없기 때문에
argocd 네임스페이스 생성 후에 클러스터 등록을 해준다.
k create ns argocd

argocd login argocd.somaz.link

argocd cluster add <gke_project_region_clustername> --name <cluster-name> --system-namespace <namespace> (default=kube-system)
argocd cluster add gke_somaz-project_asia-northeast3_somaz-gke --name somaz-gke --system-namespace argocd
그리고 추가내용이 있다. cm을 수정해준다.
`helm으로 application resource` 를 생성하면 정의하지 않는 리소스가 많이 생성된다.
`cilium` 이라는 리소스가 있는데 해당 리소스 떄문에 `OutOfSync` 이 사라지지 않는다.
그래서 아래와 같이 cm을 수정해 무시해준다.
k edit cm -n argocd argocd-cm
...
apiVersion: v1
data:
  resource.exclusions: |
    - apiGroups:
      - cilium.io
      kinds:
      - CiliumIdentity
      clusters:
      - "*"

k get po -n argocd | grep argocd-server
argocd-server-56769fd48c-jph2r                      1/1     Running   0               2d21h
argocd-server-56769fd48c-x4krn                      1/1     Running   0               2d21h

k delete po -n argocd argocd-server-56769fd48c-jph2r argocd-server-56769fd48c-x4krn
pod "argocd-server-56769fd48c-jph2r" deleted
pod "argocd-server-56769fd48c-x4krn" deleted
마무리
GitLab과 ArgoCD를 연동하는 과정은 GitOps의 기반을 다지는 데 있어 매우 중요한 단계이다. 특히 사내 GitLab 서버를 사용하는 경우에는 SSH known_hosts 등록을 수동으로 처리해주어야 하며, 이를 통해 보안성과 연결 안정성을 확보할 수 있다.
이번 포스팅을 통해 GitLab 저장소를 ArgoCD에 연동하고, 저장소 기반으로 Application을 선언적으로 배포하는 전 과정을 익힐 수 있었다.
이후에는 GitLab CI/CD 파이프라인과 ArgoCD를 결합하여, 이미지 빌드 → Helm/Kustomize 값 커밋 → 자동 배포로 이어지는 완전 자동화 환경도 구성할 수 있다.
GitOps의 실전 적용을 고려하는 조직이라면, ArgoCD와 GitLab의 연동은 가장 먼저 구축해볼 만한 강력한 자동화 기반이다.
앞으로는 GitLab Webhook 연동, SOPS+Sealed Secrets를 통한 보안 배포 자동화, ApplicationSet과 Helm의 결합 등 더 고도화된 활용법도 다룰 예정이다.
Reference
https://argo-cd.readthedocs.io/en/stable/operator-manual/ingress/#ingress-configuration